HubSpot Onboarding: The Complete Checklist for Sales Teams
The only HubSpot onboarding guide built for sales teams. Follow this week-by-week checklist to set up pipelines, sequences, and Sales Workspace the right way.
You just signed up for HubSpot Sales Hub. Your team has licenses. Your boss expects results.
Now what?
Here's what usually happens: reps click around for a week, set up half a pipeline, skip the training, and three months later your CRM is a ghost town. That's not a HubSpot problem - that's a setup problem.
Most HubSpot onboarding guides are written for marketing teams (or everyone at once). They'll walk you through tracking codes and email authentication before they even mention your sales pipeline. I've read MarketVeep's "Ultimate Guide" and Campaign Creators' 10,000-word service page cover to cover. Both are solid resources, but MarketVeep covers all hubs generically (their step-by-step is the same whether you're in marketing or sales), and Campaign Creators is focused on selling their onboarding packages (starting at $2,400) rather than showing you how to do it yourself. Neither tells a sales leader exactly what to set up on day one.
This guide is different. It's a week-by-week checklist built specifically for sales teams. No fluff, no theory. Just the exact steps to go from "we just bought HubSpot" to "the team is crushing it" in 30 days.
Key takeaways
Short on time? Here's the gist:
• Follow a 4-week checklist to get your sales team fully operational on HubSpot
• Set up Sales Workspace, lead pipelines, and sequences so reps can focus on selling
• Automate stage progression so nobody wastes time on admin work
• Sync LinkedIn activity from day one for complete visibility on your team's outreach
If you have 10 minutes to spare, keep reading for the full breakdown.
What is HubSpot onboarding (and why sales teams need their own plan)?
HubSpot onboarding is the process of setting up and configuring your HubSpot account so your team can actually use it. As one HubSpot partner explains, it's about "capitalizing on HubSpot's stack of heavy-hitting features" rather than just logging in and hoping for the best.
But here's the thing most guides miss: they treat every team the same. The typical onboarding framework covers marketing automation, service tickets, CMS setup, and sales pipelines all in one go. That's fine for a general overview, but it leaves sales leaders without a clear, focused action plan.
Sales teams have specific needs:
• A deal pipeline that matches your actual sales process (not a generic template)
• Lead routing so the right rep gets the right prospect
• Sequences for consistent outreach at scale
• Activity tracking that captures calls, emails, and LinkedIn touches
• Dashboards that show managers what's actually happening
If your onboarding plan doesn't address these from day one, your reps will default to spreadsheets and sticky notes. I've seen it happen too many times.
The complete HubSpot onboarding checklist for sales teams
Here's the 4-week plan. Each week builds on the last. Don't skip ahead.
Week 1: foundation (account setup and data)
Before your reps touch anything, the foundation needs to be solid. This is the "boring" week that pays dividends for months.
☐ Set up user accounts and permissions. Create accounts for every sales rep. Assign Sales Hub seats. Set permissions so reps see what they need and nothing more. A practical tip: create a "Sales Rep" permission set that you can reuse. It should include access to contacts, companies, deals, and tasks, but lock down settings and account-level configurations. As Campaign Creators notes in their onboarding packages, proper user permissions keep your team "organized and efficient by ensuring every user has access to the right data and tools."
☐ Clean and import your contacts. This is where most teams mess up. Don't just dump a CSV into HubSpot. Remove duplicates, standardize company names, and make sure every contact has at minimum: first name, last name, email, and company. Before importing, map your CSV columns to HubSpot properties in a spreadsheet first. This avoids the classic mistake of importing "Company Name" into "First Name" because you skipped the mapping step.
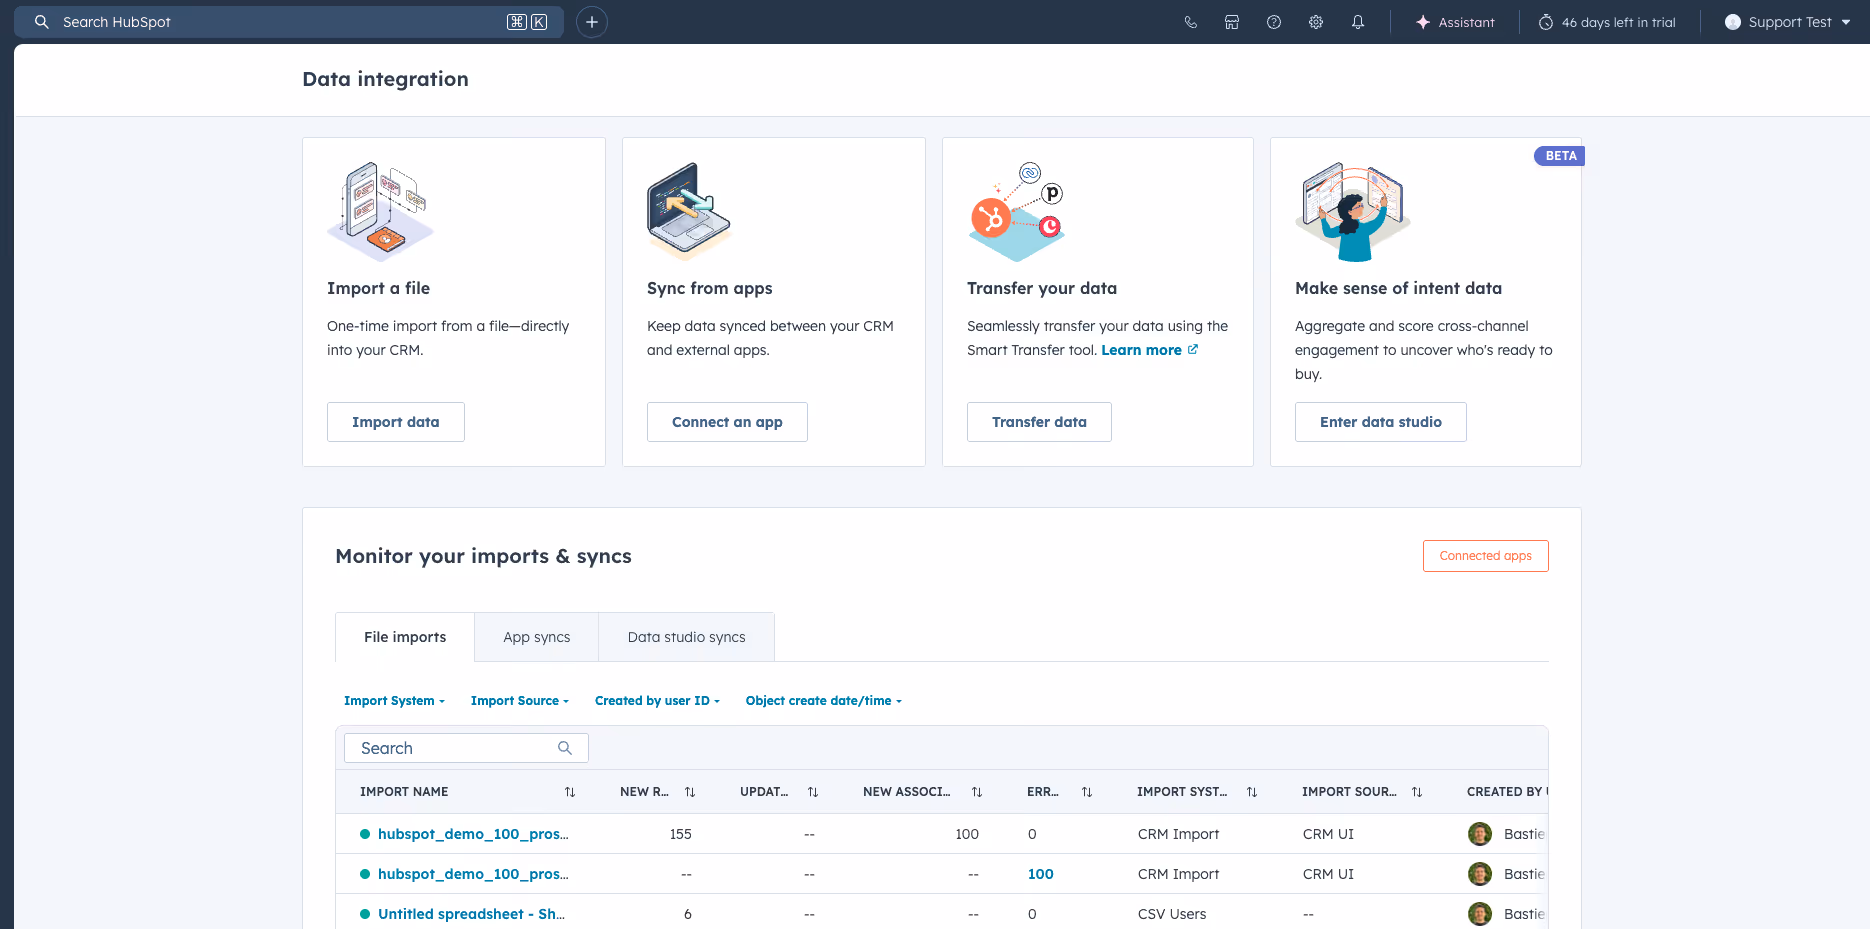
For a deeper dive, check out our guide on HubSpot data enrichment tools. If you're worried about duplicates creeping in, our HubSpot duplicate contacts guide covers how to find and merge them.
☐ Create custom contact properties for sales. HubSpot's default properties are a starting point, but your sales team needs more. I recommend creating properties for: lead source (specific, not just "web"), ICP fit score, buyer persona, and last meaningful interaction. A quick win here: create a dropdown property called "Lead Source Detail" with values like "LinkedIn Outbound," "Inbound Demo Request," "Referral," "Event," and "Cold Email." This is way more useful than HubSpot's generic "Original Source" for sales reporting.
Learn more about HubSpot contact properties in our dedicated guide.
☐ Connect email integration. Link Gmail or Outlook so reps can send tracked emails directly from HubSpot. This also logs all email activity automatically. Campaign Creators lists email sending domain setup (DKIM authentication) as one of their first implementation steps - it's that important. Make sure each rep connects their own inbox (Settings > General > Email > Connect personal email). Don't skip this: without it, HubSpot can't track opens or log replies.
☐ Install the HubSpot tracking code. This lets you see when prospects visit your website. It's a 2-minute task that gives your reps invaluable context before every call. You'll find it under Settings > Tracking & Analytics > Tracking Code. Copy the snippet and paste it before the closing tag on your website. If you're on WordPress, use the HubSpot plugin instead.
☐ Connect your core integrations. At minimum: Slack (for notifications), your calendar (for meeting scheduling), and LinkedIn. HubSpot's App Marketplace has 1,800+ integrations, but start with three or four that your sales team actually needs. Check our list of must-have integrations for HubSpot Sales Hub to pick the right ones.
Pro tip: Resist the urge to import every contact you've ever collected. Start with your active pipeline and recent leads (last 6 months max). You can always import historical data later once your processes are solid.

Ready to fix your outbound process?
Week 2: sales pipeline and deal management
Your foundation is in place. This week you build the engine that drives everything: your pipeline. Get your pipeline right and everything downstream (reporting, forecasting, automation) works. Get it wrong and you'll be rebuilding it in three months.
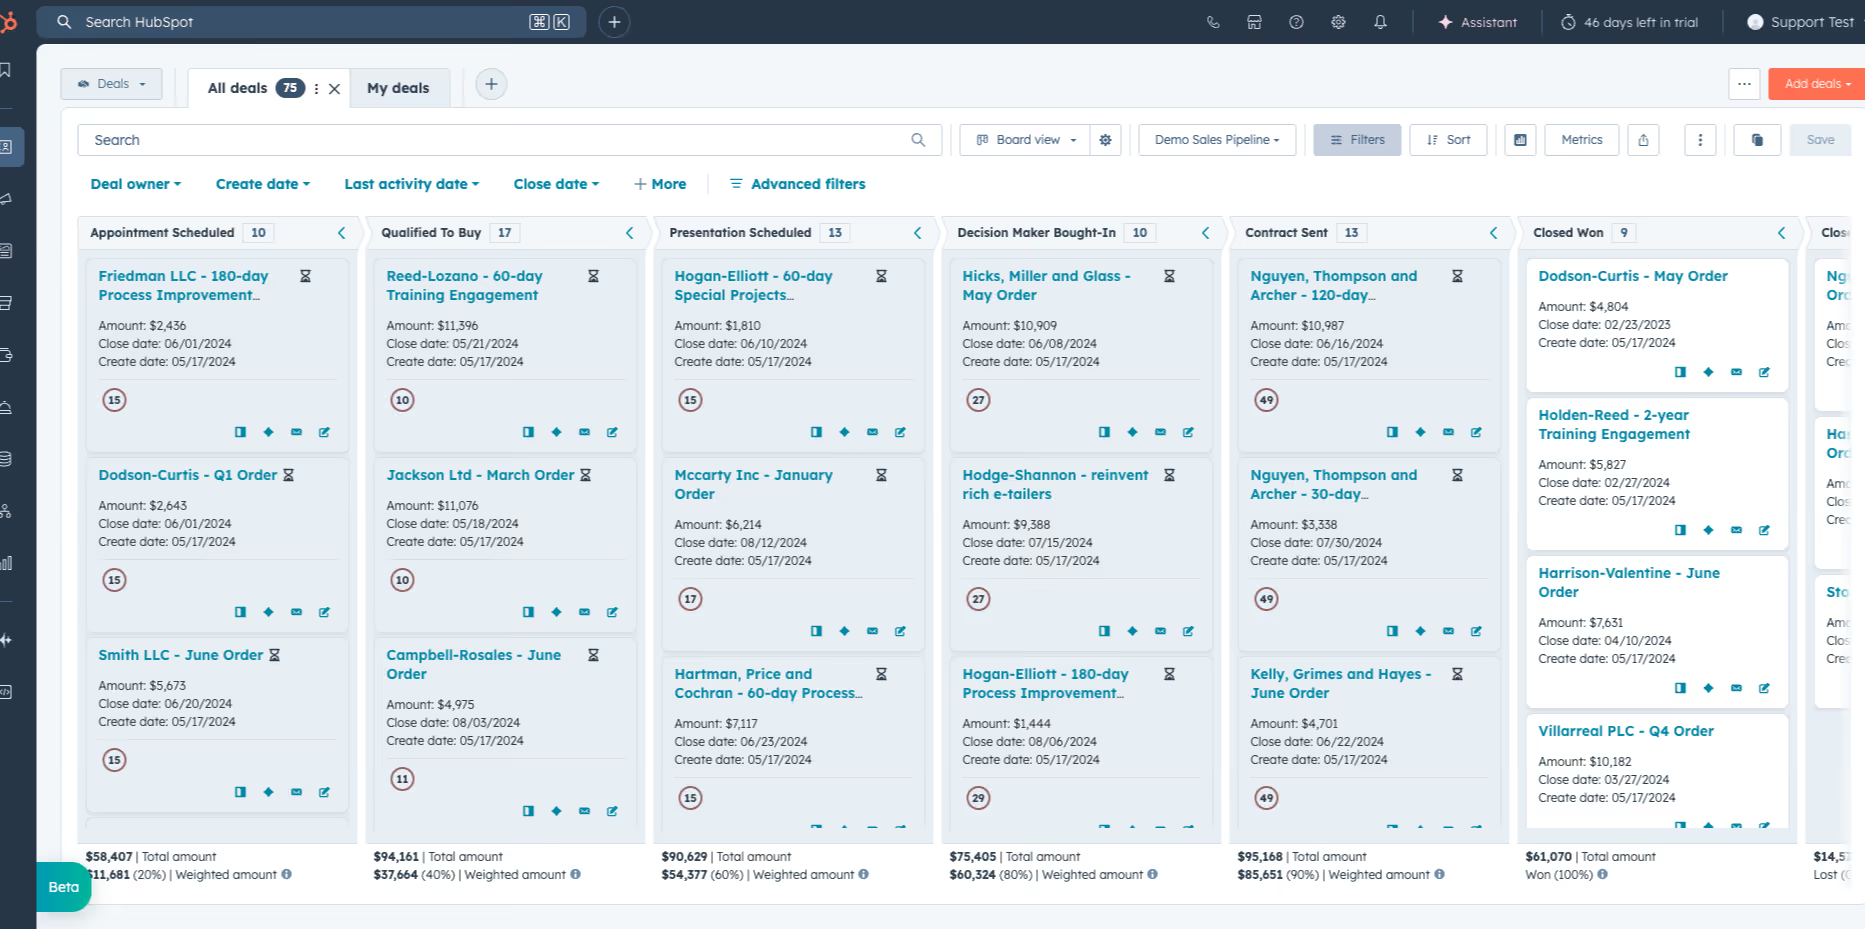
☐ Build your deal pipeline with custom stages. Map your actual sales process to pipeline stages. Keep it simple: 5-7 stages maximum. Something like: Qualified > Discovery > Demo > Proposal > Negotiation > Closed Won / Closed Lost. Each stage should represent a specific action that happened, not a vague status. Here's a practical test: if a rep can't explain in one sentence what needs to happen to move a deal to the next stage, your stages are too vague. For a complete walkthrough, see our HubSpot pipeline management guide.
☐ Set up deal properties. Beyond the defaults, create properties for: expected close date, deal source, competitor mentioned, and reason lost. These power your reporting later. One property most teams forget: "Next Step." A single-line text field where reps write the next concrete action. It takes 5 seconds to fill in and saves managers from asking "what's happening with this deal?" in every 1:1. Here's our full guide on HubSpot deal properties.
☐ Configure your lead pipeline with auto-stage progression. This is a game-changer most teams skip. A lead in HubSpot is a special object that sits between "contact" and "deal." You create leads automatically when a contact reaches a certain lifecycle stage (like "Lead" or "Qualified Prospect"). The real power? Auto-stage progression. As CJ Maurer from The Gist explains: "Deals automatically move from new to working once emails or calls are made. Literally there's no manual administrative work for the sales rep." Set it up so leads move through stages based on activity: New to Working when a rep places activity, Working to Engaged when the lead reciprocates (responds to an email, books a meeting). CJ also points out that if you have Sales Navigator, "there's amazing things you can do" directly from the leads view. The reporting value is huge too: "If you have some reps that are quickly placing activity on these leads, there's very few in the new stage. They're all at least in engaging. Whereas some reps, let's face it, resist doing the activity. And you're going to see a bunch of leads in that new stage." For the full setup, check out our guide on HubSpot lead status and the HubSpot leads object deep dive.
☐ Set up lead qualification and disqualification reasons. When a rep qualifies a lead, require them to create a deal - this is configurable in your lead pipeline settings. When they disqualify, require a reason (budget, timing, not a fit, etc.) and a follow-up task. As CJ Maurer puts it: "You're essentially closing the loop. If I say this is disqualified, I'll put the disqualification reason, leave a note, and then you can make it so that depending on the disqualification reason, your rep is required to put in a follow-up task for the future." This is where most CRMs become lead graveyards. HubSpot's disqualification workflow prevents that.
☐ Create deal-based workflows. Start with three: (1) notify the rep when a deal moves to a new stage, (2) create a follow-up task when a deal sits in one stage too long (7 days is a good default), and (3) alert the manager when a high-value deal is created. For more ideas, check our HubSpot workflow examples and workflow best practices.
Good to know: Don't build multiple pipelines unless you have genuinely different sales processes (for example, new business vs. renewals). One pipeline with clear stages beats three pipelines that nobody maintains.
Week 3: sales tools and outreach
Your pipeline is set up. Now give your reps the tools to fill it. This week is about making HubSpot the place where selling happens, not just where data lives.
☐ Set up Sales Workspace as your reps' daily command center. This is HubSpot's newer tool and it's excellent. As CJ Maurer recommends: "If you're a sales leader, you should train your team to bookmark this and start every day opening up this summary." It shows tasks (with priority levels and custom task queues), sequence enrollments, guided actions (AI-powered follow-up recommendations split into "closing related" and "prospecting related"), your calendar, and an activity feed with updates on leads and deals. CJ Maurer also mentions task types and task queues that let you customize how reps work through their daily priorities. No other onboarding guide even mentions Sales Workspace, and it's arguably the most important daily tool for your reps. For more on task management, see our guide on how to use HubSpot tasks.
☐ Create email templates and snippets. Build templates for your most common outreach scenarios: intro email, follow-up after no response, post-demo recap, and proposal follow-up. Keep them short and personalized. A good template has 3-5 personalization tokens (first name, company, specific pain point) and stays under 150 words. Anything longer gets skimmed or ignored. Check out our HubSpot sales email templates guide.
☐ Build 2-3 sequences for common outreach scenarios. Sequences are automated email cadences that send from the rep's inbox. Start with: (1) cold outreach sequence (3-5 touches over 2 weeks), (2) post-demo nurture (3 touches over 10 days), and (3) re-engagement for gone-cold leads (2 touches with a breakup email). CJ Maurer calls sequences "another absolutely critical sales tool" - and the Sales Workspace shows contacts enrolled in sequences right on the summary page, so reps can manage everything from one place. Quick tip: set your sequence timing to send emails between 8-10 AM in the prospect's timezone.
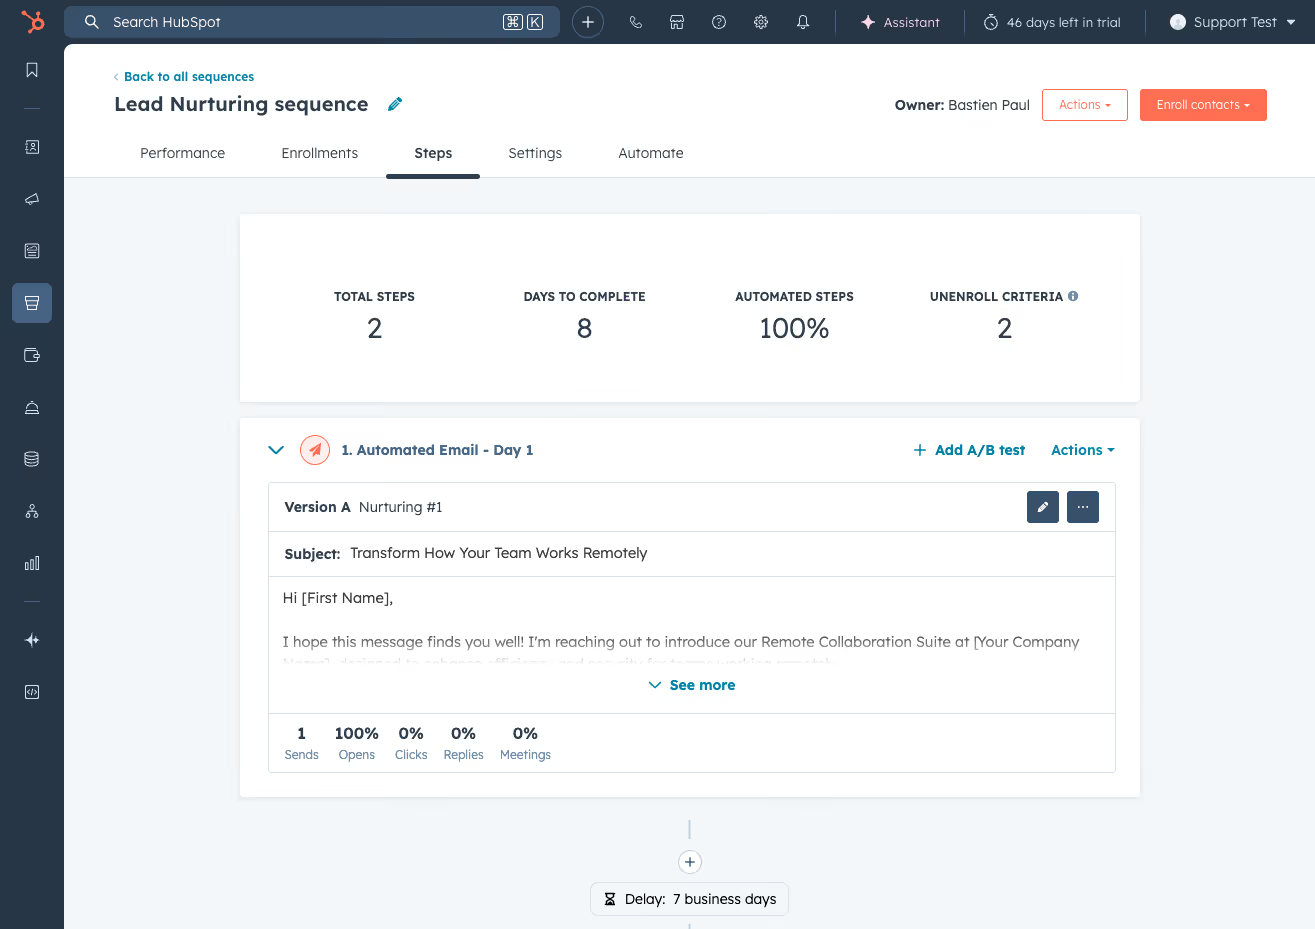
For inspiration, here are our favorite HubSpot sequence examples. Want to understand when to use sequences vs. workflows? We've got a comparison guide for that.
☐ Configure your meeting scheduler. Set up your team's meeting links with available time slots, buffer time between meetings (15 minutes minimum - your reps need a breather), and custom confirmation emails. This eliminates the back-and-forth of scheduling. Add the meeting link to your email signature and sequence steps. Here's how to set up your HubSpot meeting scheduler.
☐ Set up calling with custom outcomes. If your team makes calls, configure custom call outcomes beyond HubSpot's defaults. Add outcomes like "Gatekeeper reached," "Voicemail - left message," and "Decision maker connected." This data is gold for coaching. You can also record calls (with consent) for training purposes using HubSpot's conversation intelligence features. For the full calling setup, see our HubSpot calling guide.
☐ Connect LinkedIn and Sales Navigator. Your reps spend hours on LinkedIn every day. Without syncing that activity back to HubSpot, you're flying blind on a massive chunk of their outreach. Hublead connects LinkedIn and HubSpot so that connection requests, messages, and InMails are automatically logged as activities on the contact record. That means your pipeline reports actually reflect what's happening - not just the emails and calls. Plus, the Sales Workspace will show LinkedIn outreach right alongside email and call activity. For the full integration guide, see our HubSpot LinkedIn Sales Navigator integration page.
Tip: Don't try to launch everything at once. Start with the Sales Workspace and sequences in week 3, then layer in calling and LinkedIn sync once reps are comfortable.
Week 4: reporting, training, and go-live
Setup is done. Now make sure your team can use it and that you can see what's working.
☐ Build your core sales dashboards. Every sales leader needs three dashboards: (1) Pipeline dashboard showing deals by stage, value, and velocity, (2) Activity dashboard showing calls, emails, and meetings per rep, and (3) Conversion dashboard showing lead-to-deal and deal-to-close rates. Start with HubSpot's dashboard templates, then customize. Don't build 15 dashboards in week one. Three solid ones beat fifteen mediocre ones. Check out our HubSpot dashboard examples for templates.
☐ Create manager reports. Beyond dashboards, build reports for: deals created this month by rep, average time in each pipeline stage, and sales funnel conversion rates. One report most managers miss: "Deals with no activity in 7+ days." This surfaces stalled deals before they die quietly. These help you spot coaching opportunities early.
☐ Run hands-on training sessions. Don't just demo the tool. Have each rep complete specific tasks during training: log a call, enroll a contact in a sequence, create a deal, and update a lead status. MarketVeep makes a good point in their guide: "Even if you're familiar with CRM systems, skipping comprehensive team training can lead to inconsistent use and underutilization." Training should be role-specific. Your SDRs need sequences and lead management. Your AEs need pipeline and deal workflows. Your manager needs dashboards and reporting. One generic session won't cut it. Learning by doing sticks better than watching a screen share.
☐ Document your sales process in HubSpot. Create a simple playbook (even a Google Doc works) that answers: when do I create a deal? What properties do I fill in? When do I disqualify a lead? How do I log a LinkedIn interaction? This becomes your team's reference guide. As MarketVeep rightly emphasizes: "Keep track of every setup decision - custom properties, workflows, naming conventions, user roles, and integration points." Future you (and any new hire) will thank you.
☐ Launch and monitor adoption metrics. Track these weekly for the first month: number of activities logged per rep, deals created, sequences enrolled, and login frequency. If a rep isn't logging in daily, that's your signal to intervene. Set a benchmark: each rep should log at least 10 activities per day (calls + emails + LinkedIn touches) by end of week 4.
Pro tip: Schedule a 30-minute "HubSpot office hours" every week for the first month. Reps will have questions they won't ask in a group training. Make it easy for them to get unstuck.
5 HubSpot onboarding best practices for sales teams
Beyond the checklist, these practices make the difference between a CRM that gets used and one that collects dust.
1. Start with your pipeline, not your data.
Most guides say "import your data first." I disagree. Define your pipeline stages and deal properties first. This tells you exactly what data you need and how to structure it. Importing before you know your pipeline is like furnishing a house before you know the floor plan.
2. Automate stage progression so reps don't have to update manually.
This is the single biggest adoption hack. If reps have to manually move leads from "New" to "Working" every time they send an email, they won't do it. Set up automation so leads progress based on activity. As CJ Maurer puts it: "All they have to do is open up their leads, see which ones they need to respond to and actually just focus on the activity rather than updating things in the CRM."
3. Make the Sales Workspace their homepage.
Your reps need one place to start their day. The Sales Workspace shows tasks, sequence enrollments, guided actions, and calendar all in one view. If your team opens HubSpot and sees a useful dashboard instead of a confusing menu, they'll keep coming back. As CJ Maurer says: "If you're a sales leader in B2B, I don't know how you get the most out of your sales team without using this HubSpot Sales Workspace."
4. Sync LinkedIn activity from day one.
In B2B sales, a huge percentage of prospecting happens on LinkedIn. If those interactions don't show up in HubSpot, your reporting is incomplete and your manager has no visibility. Tools like Hublead sync LinkedIn connection requests, DMs, and InMails directly to HubSpot contact records. Set this up during onboarding, not six months later. You can even automatically create follow-up tasks when a LinkedIn invite is accepted or trigger HubSpot sequences from LinkedIn engagement.
5. Measure adoption, not just setup completion.
"We finished onboarding" doesn't mean anything if reps aren't logging in. Track daily active users, activities logged per rep, and deals created. If numbers drop after week 2, you have an adoption problem, not a setup problem.
Common HubSpot onboarding mistakes (and how to avoid them)
I've seen these mistakes over and over. Here's how to dodge them:
Importing dirty data. Garbage in, garbage out. If you import 50,000 contacts with no email addresses, incomplete company names, and contacts from 2018, you're polluting your CRM from day one. MarketVeep calls poor data setup "one of the biggest mistakes" in onboarding, and they're right. Clean first, import second. Run a HubSpot data audit within the first month to catch anything you missed.
Building too many pipelines. One pipeline for new business is enough for most teams. Two pipelines (new business + renewals) is the max for most SMBs. If you have five pipelines in month one, something went wrong.
Skipping sequence setup. Sequences are the single most powerful sales tool in HubSpot. If your reps are sending one-off emails instead of enrolling contacts in sequences, they're leaving efficiency on the table. Even two or three well-crafted sequences will save hours per week per rep.
Not connecting LinkedIn. Your reps are prospecting on LinkedIn whether you like it or not. If that activity isn't in HubSpot, you have a visibility gap. Fix this during onboarding, not six months later.
Rushing automation without a strategy. MarketVeep nails this: "Automation should be built around well-defined processes and clear goals." Don't automate a broken process. Get your pipeline and stages right first, then add workflows. For guidance on building automation the right way, check our HubSpot sales automation guide.
Training once and never again. A single training session during onboarding is not enough. Schedule monthly refreshers, share tips in Slack, and create short video walkthroughs for common tasks. Adoption is a marathon, not a sprint.
HubSpot onboarding cost: what to expect
Let's talk money. HubSpot onboarding cost depends on the path you choose:
HubSpot's direct onboarding (required for new Pro/Enterprise customers):
• Sales Hub Professional: €1,470 one-time (required)
• Sales Hub Enterprise: €3,420 one-time (required)
• Includes customized onboarding plan, CRM customization, baseline reporting setup, team onboarding, and standard automation setup
• Source: HubSpot onboarding services, as of February 2026
Partner agency onboarding:
• Ranges from $2,400 to $7,000+ depending on complexity
• For example, Campaign Creators (550+ successful onboardings) charges from $2,400 for Marketing Hub Professional to $7,000+ for Enterprise-level multi-hub setups
• Includes hands-on setup, custom configuration, data migration, and training
• Best for teams without internal HubSpot expertise or complex integrations
DIY with this checklist:
• $0 (just your time)
• Best for teams with some CRM experience who want full control
• Estimated time investment: 20-30 hours over 4 weeks
When to hire a partner: If you're migrating from another CRM (especially Salesforce), have complex data structures, or need custom integrations, a certified partner is worth the investment. Campaign Creators handles API data migrations from Salesforce, Dynamics, and Pipedrive as a separate service. If you're starting fresh with a small team (under 10 reps), this checklist and HubSpot Academy will get you there.
Get your sales team productive on HubSpot
HubSpot onboarding isn't complicated. It's just structured work that most teams skip or rush through. Follow this 4-week checklist, focus on the tools your reps will actually use daily (especially Sales Workspace and sequences), and measure adoption from week one.
The difference between teams that love HubSpot and teams that abandon it almost always comes down to onboarding. Do it right and your reps have a system that makes selling easier. Skip it and you have an expensive database nobody updates.
Start with week 1, work through the checklist, and if you want to connect your team's LinkedIn prospecting to HubSpot from day one, give Hublead a try.
Ready to fix your outbound process?
What is HubSpot onboarding?
HubSpot onboarding is the process of setting up and configuring your HubSpot account so your team can use it effectively. For sales teams, this means building pipelines, configuring lead management, setting up sequences, and training reps on daily workflows.
How much does HubSpot onboarding cost?
HubSpot's own onboarding is EUR 1,470 for Sales Hub Professional and EUR 3,420 for Enterprise (required one-time fee, as of February 2026). Partner agencies charge $2,400-$7,000+ depending on scope. You can also onboard yourself for free using guides like this one and HubSpot Academy.
How long does HubSpot onboarding take?
For sales teams following a structured plan, expect 4 weeks for core setup and training. Single-hub implementations typically take 30 days, multi-team setups 60 days, and complex multi-hub deployments with custom integrations up to 90 days.
Can you do HubSpot onboarding yourself?
Yes. With a structured checklist, HubSpot Academy courses, and some CRM experience, most small to mid-size sales teams can self-onboard successfully. The key is following a week-by-week plan rather than trying to figure everything out at once.
What is the best HubSpot onboarding partner?
It depends on your industry and needs. Look for partners with HubSpot Onboarding Accreditation and experience with sales-focused implementations. Ask for references from companies similar to yours.
.avif)